Create mixed reality models in PowerShell
Over the holidays, I found myself reading about the .obj file format. I forget why.
.obj (as in object) is the trusty old geometry definition format that nearly every 3D software can interpret, including Blender, Unity, and new Windows 10 built-in apps like Paint 3D and Mixed Reality Viewer. I’d seen it around, but frankly, I’d not thought about it much.
It turns out, the .obj file format is remarkably simple!
Lines beginning with v define vertices (points) by their x-y-z coordinates. For example, v 0 0 0 is the origin. And lines beginning with f define faces by connecting vertices using their index (their position, in order) within the file. For example, f 1 2 3 is the triangle connecting the first three vertices. And that’s… pretty much it. Whoa.
You could author one of these by hand, I thought to myself.
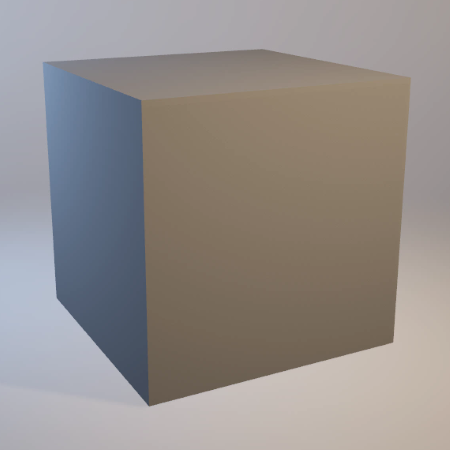
So I did. In Notepad. Here it is:
# Cube, by Cosmos

v 0 0 0
v 0 0 1
v 0 1 1
v 0 1 0
v 1 0 0
v 1 0 1
v 1 1 1
v 1 1 0

f 1 2 3 4
f 8 7 6 5
f 1 5 6 2
f 4 8 5 1
f 2 6 7 3
f 3 7 8 4
Save it as .obj extension, open it in Mixed Reality Viewer, and voila!
At this point in the story, I’m on an airplane, with many hours left in my flight.
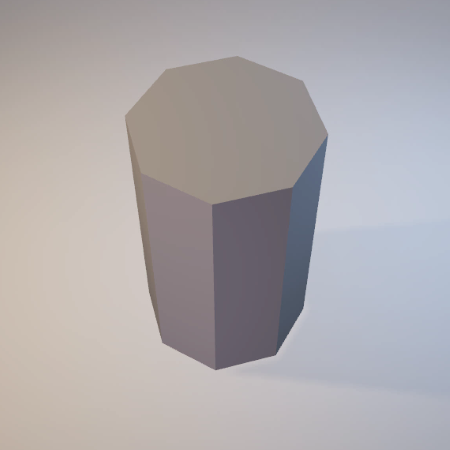
Given the circumstances, I push further. Here’s an octagonal prism:
# Lower ring vertices
v 1.00 0.00 0.00
v 2.41 0.00 0.00
v 3.41 0.00 1.00
v 3.41 0.00 2.41
v 2.41 0.00 3.41
v 1.00 0.00 3.41
v 0.00 0.00 2.41
v 0.00 0.00 1.00

# Upper ring vertices
v 1.00 6.00 0.00
v 2.41 6.00 0.00
v 3.41 6.00 1.00
v 3.41 6.00 2.41
v 2.41 6.00 3.41
v 1.00 6.00 3.41
v 0.00 6.00 2.41
v 0.00 6.00 1.00

# Ends
f 08 07 06 05 04 03 02 01
f 09 10 11 12 13 14 15 16

# Sides
f 01 02 10 09
f 02 03 11 10
f 03 04 12 11
f 04 05 13 12
f 05 06 14 13
f 06 07 15 14
f 07 08 16 15
f 08 01 09 16
And in Mixed Reality Viewer:
This is neat! I’m having fun. But the octogon is the last easy regular polygon.
How to make an n-sided cylindrical polyhedron? Ordinarily, you’d use fancy software for this, but unfortunately, I have none, and I’m stuck on this plane. What apps do I have?
Aha! PowerShell.
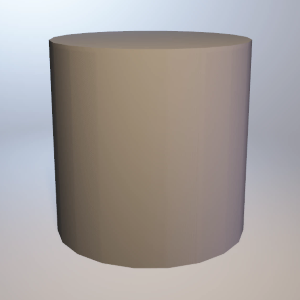
It takes about an hour of stumbling around to get the syntax right (no online help, mind you), but eventually we’re in business. The approach is straightforward: take two circles of radius r some height h apart, evaluates n points around them, and connect them together to form an n-sided cylinder. Write it all to an output file, taking care to use ASCII encoding.
It works!
This model was generated in PowerShell. n = 10
Here’s the script. It’s actually fewer than 50 lines, even generously commented.
$FilePath = "rcc_20.obj"

# Number of vertices to compute to approximate circular ring

$N = 20

# Radius of the base

$R = 2

# Height between the bases

$H = 4

"# Right circular cylinder with radius $R, height $H, and $N vertices" | Out-File -FilePath $FilePath -Encoding ascii

# Vertices

1..($N) | ForEach {
    # Cumulative angle in radians, from 0 -> 2Pi

    $A = $_ / $N * [Math]::Pi * 2
    $X = [Math]::Round([Math]::Cos($A) * $R , 3)
    $Z = [Math]::Round([Math]::Sin($A) * $R , 3)

    # Lower ring vertices

    "v $X 0 $Z" | Add-Content $FilePath

    # Upper ring vertices

    "v $X $H $Z" | Add-Content $FilePath
}

# Cylinder bases

$UpperBase = ""
$LowerBase = ""
1..(2 * $N) | ForEach {

    # Even index vertices are upper ring

    If ($_ % 2 -Eq 0) {
        $UpperBase = "$_ " + $UpperBase
    }

    # Odds are lower ring

    Else {
        $LowerBase = $LowerBase + "$_ "
    }
}
"f $UpperBase" | Add-Content $FilePath
"f $LowerBase" | Add-Content $FilePath

# Cylinder side walls

1..(2 * $N - 3) | ForEach {
    If ($_ % 2 -Eq 1) {

        # Generalize from 1 -> 2 -> 4 -> 3 base case, odds only

        $v1 = $_
        $v2 = $_ + 1
        $v3 = $_ + 3
        $v4 = $_ + 2
        "f $v1 $v2 $v3 $v4" | Add-Content $FilePath
    }
}

# Close it up!

"f -2 -1 2 1" | Add-Content $FilePath
Adjusting n adjusts the output level of detail.
Turns out, there is subtlety in the .obj format. In 3D modeling, faces are generally one-sided, meaning they are opaque seen one way, but completely see-through seen the other way. There’s no good real-world analogy, it’s just how it is. In .obj, the direction of the face is implicit from the vertex order: they are declared counter-clockwise.
In addition to face normals, you can declare (optional) vertex normals in lines beginning with vn. For example, vn 0 0 1 is the unit vector along the positive z-axis, “forward” in most software. You reference vertex normals by index too, after each vertex. So f 1//1 2//1 3//1 is the triangle from before, further specified to face forward at every corner.
Specifying the exact normal to the surface per point, rather than per face, lets the renderer interpolate to achieve smooth shading despite our relatively low-polygon model. In this case, the normal is conveniently along the radial axis, always. The results are surprisingly good:

The cylinder without shading, then with shading. n = 20
In software packages like Blender, the only pre-made shapes that come included are things like cubes, cylinders, and spheres. Everything else is derived from there. generate-cylinder.ps1 is my first building block.
What can we make with cylinders?
This wedding cake is what!
The generate-wedding-cake.ps1 script, available on GitHub, is about 100 lines. It encapsulates what generate-cylinder.ps1 did as the New-Cylinder function, adding vertex normals for smoothing.
It also adds the ability to vary the cylinder radius to create “wavy” edges.
And, most noticeably, it uses an .mtl (as in material) file to add color. It turns out that .mtl is stunningly simple too! This file defines two materials, white and pink, using just RGB values for ambient, diffuse, and specular reflectivity.
newmtl white
Ka 1.00 1.00 1.00
Kd 1.00 1.00 1.00
Ks 1.00 1.00 1.00
Ns 1
illum 1

newmtl pink
Ka 1.00 0.80 0.80
Kd 1.00 0.80 0.80
Ks 1.00 0.80 0.80
Ns 1
illum 1
All we need is to repeatedly invoke New-Cylinder with different r, h, and y, the starting height, and optionally p, the number of wavy pedals to add around the circumference. And, use the materials we defined.
Here’s the relevant excerpt:
# Cake foundation

"usemtl white" | Add-Content $FilePath
New-Cylinder -FilePath $FilePath -n 60 -UseShading -r 40 -h 20 -y 4
New-Cylinder -FilePath $FilePath -n 60 -UseShading -r 30 -h 20 -y 28
New-Cylinder -FilePath $FilePath -n 60 -UseShading -r 20 -h 20 -y 52

# Cake accents

"usemtl pink" | Add-Content $FilePath
New-Cylinder -FilePath $FilePath -n 60 -UseShading -r 41 -h 4
New-Cylinder -FilePath $FilePath -n 60 -UseShading -r 31 -h 4 -y 24
New-Cylinder -FilePath $FilePath -n 60 -UseShading -r 21 -h 4 -y 48

# Cake pedals

"usemtl white" | Add-Content $FilePath
New-Cylinder -FilePath $FilePath -n 60 -UseShading -r 35 -h 1 -y 24 -p 15
New-Cylinder -FilePath $FilePath -n 60 -UseShading -r 25 -h 1 -y 48 -p 15
New-Cylinder -FilePath $FilePath -n 60 -UseShading -r 15 -h 1 -y 72 -p 15
Cylinders are cool, but it’s time to level up.
Can we make this wine glass?

Image copyright Crate & Barrel
I’ll admit that by this point, I’ve landed at home and could easily just install Blender, but no way! I’m committed to this PowerShell thing. Jeffrey is going to be so proud of me.
To create the original cylinder, we parameterized a circle in the horizontal plane, then another one above it, and added side walls connecting them. We can generalize this trick. Imagine we made the radius of the second circle smaller; we’d have a cone. Add a third circle, bigger again; we’d have an hourglass.
The next level is to parameterize the profile in the cross-sectional radius-height plane. For each point h along the height axis (horizontal in the graph below) we define the radius r(h). Given the shape we want, and the concavity, the function is inevitably piecewise.
Here’s the profile parameterized in terms of guide circles, numbered, and straight lines:
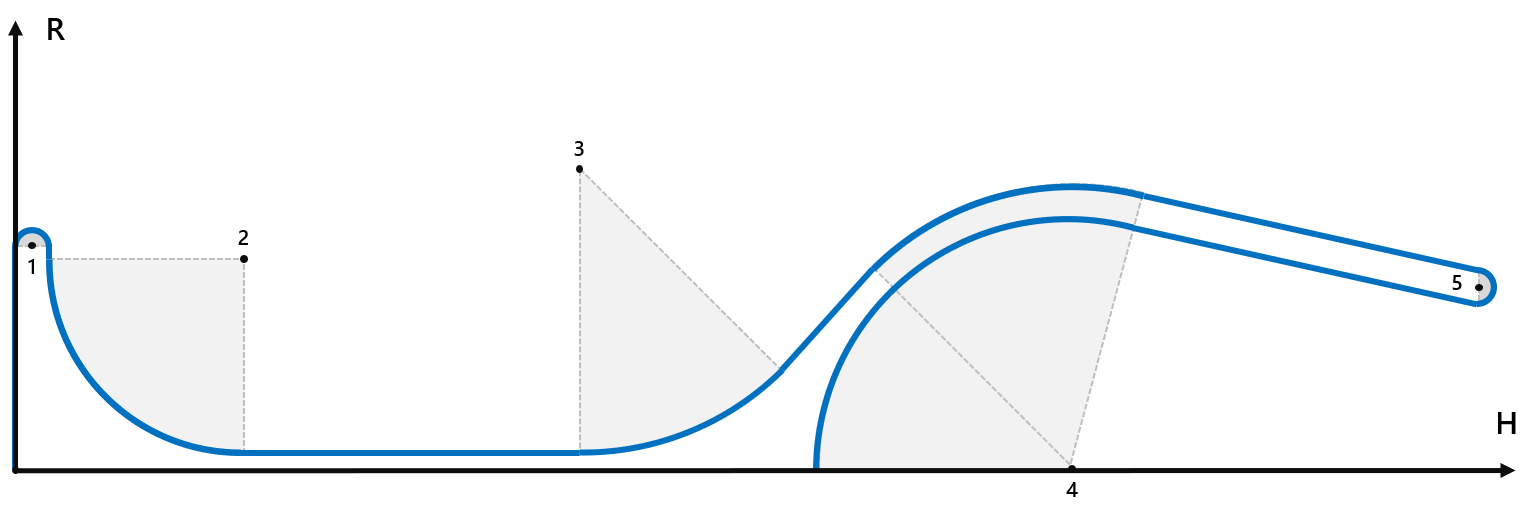
Now, take h as the height along the vertical y-axis. At each of n points, create a circle of radius r(h) and connect it to the prior circle with quadrilateral side walls.
It works!
Admittedly, using PowerShell to generate models in this way is laughably inefficient. Simply to write the geometry to the file (not render it) takes nearly thirty seconds, even on my desktop. It has an Nvidia GPU. We are so far away from using it.
The last touch is to add smooth shading and materials, like highly specular glass.
All in, generate-wine-glass.ps1 is fewer than 200 lines, even with comments. See it on GitHub.
And as the name implies, Mixed Reality Viewer (much like ARKit or ARCore) lets us place the model into the real world, with primitive but convincing-enough shadows and motion tracking:
So there you have it. No fancy software, just in-box Windows tools like Notepad, Mixed Reality Viewer, and most importantly albeit unusually, the PowerShell language and console.
Feels like magic to me.